Suzuki Swift control arm replacement
A 10 year old Suzuki Swift (2005) gave him a career as a capital city, so his chassis got this.
The rubber parts still love aging over 10 years, and this is especially true for a heavyweight silent.
The end result: (Do not poke upper nuts!)
Not only was she tying the silencer, but she began to separate it from the metal cape.
Replacement
of the swingarm is not complicated (3 screws), but it is rather
complicated.
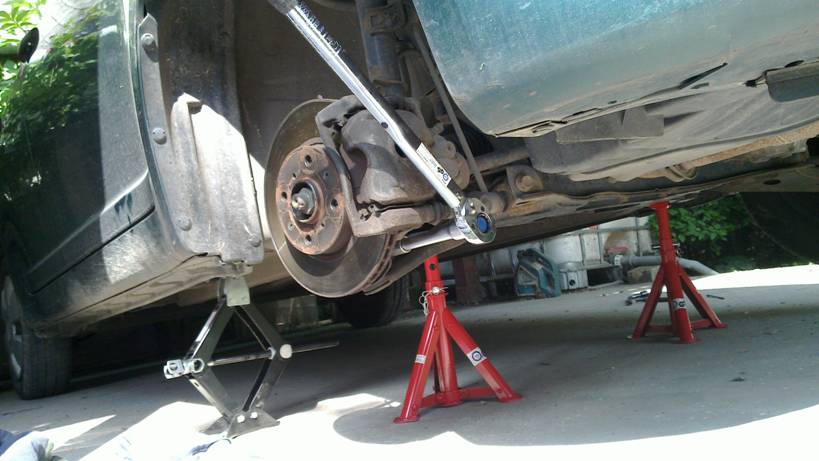
First step: pull the handbrake well.
Then you need
to loosen the front wheels bolts, raise the car and then properly
support it !!!
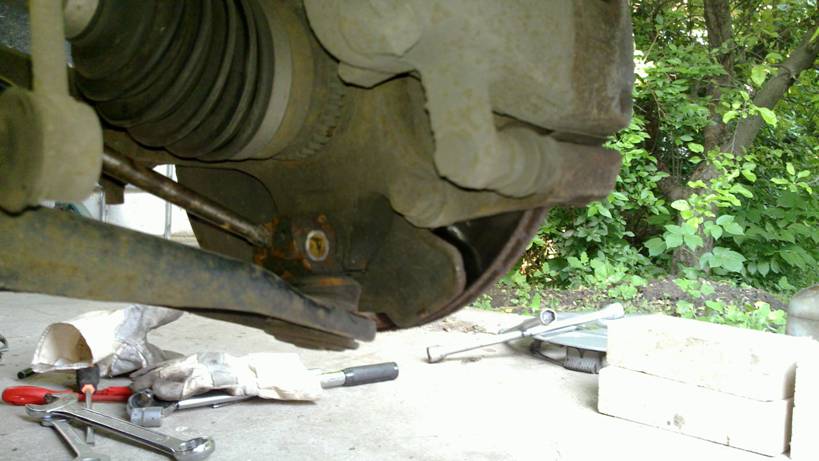
Get rid of wheels and almost everything is
available.
The ball closure at the end of the swing arm can be
ejected with 2 plugs / star wrenches. This screw must be completely
removed,
Because it closes the tip of the ball head shaft.

The
other two screws can be removed with a 19 socket wrench. Here's the
raw force.
(I had the extra lever to pull on the stem of the
torque wrench).

On
Net I saw a video about replacing an SX4 Suzuki swingarm (virtually
identical to Swift).
There, the top nuts were pressed with a
socket wrench 21 and heated with the flame by the "good man"
because he did not want to come down …
Of course, he did
not want to be cured by spot welding …
The point is, if you
want to touch a 21-pin socket, you'll need to touch one of your
hands, because you do not have to!
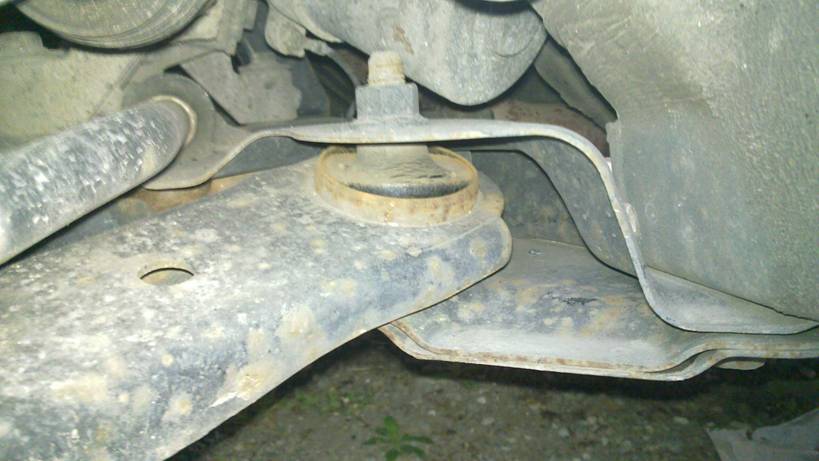
In the picture above, you can
scroll the vertical screw from the bottom.
The horizontal screw
will require the same socket wrench. This is easier for something to
come to (no need to contradict anywhere).
The axis of the ball
head was so damned that I wrestled with my right hand for 1
hour.
After removing the screw, it is recommended to insert a
wedge / chisel into the slot so that it does not tension the shaft.

Here is the "reverb". It came out of the place with the ball joint with a 36mm wrench with hammer strike ...
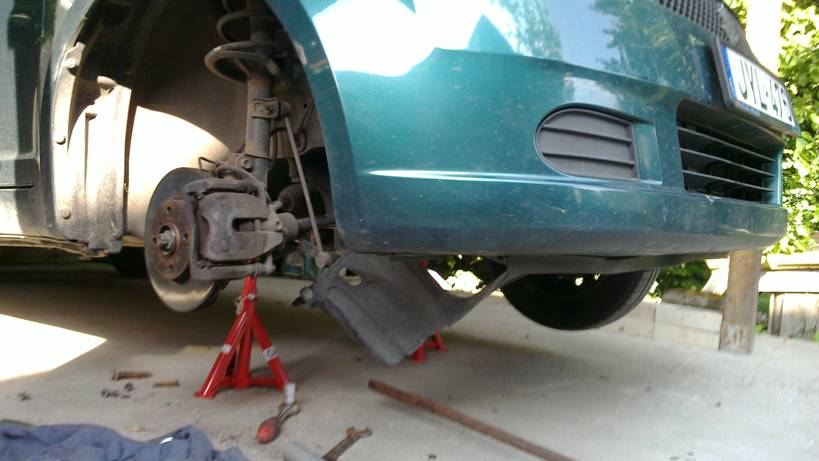
It
is advisable to remove plastic coverings to remove the front bolt (3
pieces of patent needle are to be removed only)
Finally,
let us see the guilty ones why they had to be replaced:
I do not
think there's anything to beautify. The last few hours were the
silent. The left is "just" twisted, the right one has split
off the surface.
The buccanees were heard as it creaked.
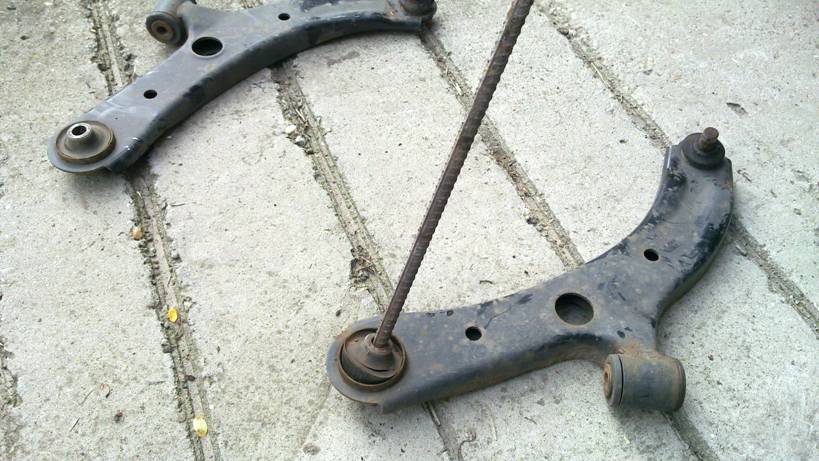
The
new looks better.

When
using bolts, it is recommended to use the adhesive tape or new
screws.
Factory tightening torques:
Ball head: 60Nm
First
(horizontal screw): 170Nm
Rear (vertical bolt): 170Nm
Follow
it, but I do not trust the accuracy of the torque wrench, so I pulled
the bolts to 200Nm (the ball head turned half a turn after
60Nm).
Some data:
Factory swingarm: 32000Ft / pcs
Manufactured
after: 7000-9000Ft / pc
Contractor's workshop fee: 15-25000Ft
If
you do not have a home torque key and you leave the wheel on the
move: It is priceless.
Required tools:
Torque wrench + extension tube, lucky for the
air key.
19, 14 socket wrench + extension shaft, (not some Chinese
biloba)
14th spanner
2-piece straight screwdriver for removing
the plastic patent
Hammer is small, big
jimmy
Lifting
Car
holder buck
Good strength
Of course, the new
swingarms.
Requires 4-5 hours of leisure time
(If someone is
not normal enough to only replace silence in the swingarm, you will
need a 60mm silent pruning tool,
But you'll have a good chance of
flipping the ball of the ball joints, so get it in advance too.)
Even
the more elongated they can use, the sprinkler is easier to remove
the swing arm, but it can be pressed smoothly (10-20kg).
After
swinging the swingarm, it is recommended that a chassis be fitted to
take the car.