Adobe house renovation
How sensitive is the loam?
How to renew it?
The use and renovation of adornments have their own rules. These
should be taken seriously, as it may cause a rapid deterioration of
the housing's structure if someone does not read it. The loam as
building material is practically ground / clay ground. As straw,
blend straw, chunks, chaff, etc.
Its blended vegetable fibers do
not allow to settle down, disintegrating the material. We can say it
is an ancient composite material.
The straw / effort strengthens,
but the compressive strength is provided by the clay soil. As the
loam is earthy material, it is easy to absorb the moisture, but it
can easily be released.
This is the secret of the creek. In
winter, when the air is dry, the walls bring the air to the room, and
if the air is too humid, the adobe walls are closed.
Thus,
humidity can be maintained throughout the year at an optimal range of
40-60%.
The problem starts if you get too much water / moisture on
the wall and / or you can not take it. In this case, rotting,
fungus,
Which let's do is not very healthy neither to us nor to
the house. If the walls are completely overwhelmed, they can cause
serious static problems, even if the building is tilted.
When
making the loam, the brick (for masonry in solid walls) dries for
weeks or months. If it is flushed, it will not dry out in 1-2 days.
Typical errors:
- Roofing: This will soon ruin the
masonry. She wanders, screams, or even slopes. This should be
terminated as soon as possible.
- Insufficient external plaster:
The weather exposed wall will deteriorate rapidly. The worst is when
the rain falls in the slightest wind (the prevailing wind is mostly
in the north, so it is most typical of the northern walls)
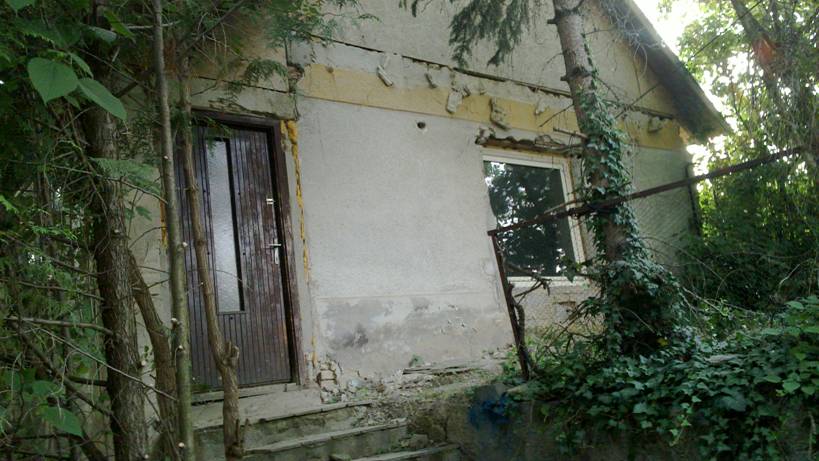
-
Running plants on the walls: This does not have to be explained too
long. The wall is ultimately ground. The roots of the plants have
nothing to do with it because it destroys it quickly.
- Landfill
ground: No debris, waste, or land should be placed on the footpath,
because it melts the masonry and falls.
- Damage / Lack of Lower
Insulation: It may cause problems with houses without foundation and
defective foundation. With some landscaping, the water must be
drained from the walls. If the wall gets more moisture from the
ground than it can give, sooner or later the wall will melt.
-
Exterior paint / plaster: The loam can only deliver the moisture to
its environment if it does not close its surface with vapor-abrasive
materials. It is strictly forbidden to admix the walls with cement
plaster. (The lower leg of the foot can be soiled outside by soaking
rain from the ground). The cement does not allow the moisture to
pass, so the water stays in the wall and accumulates.
The loam
does not "like" cement, but lime is so. Paint is forbidden
eg. Dispersion or enamel paint.
Apart from being inexpensive, the
lime passes through the vapor, and even its strong alkalinity
prevents the fungus!
It is a good idea to do the outside
plastering with a mixture of lime and sand, and it is recommended to
use reed fabrics as thermal insulation
(The reed is pervasive and
does not tend to fungus, except for very high humidity - see old
reptiles).
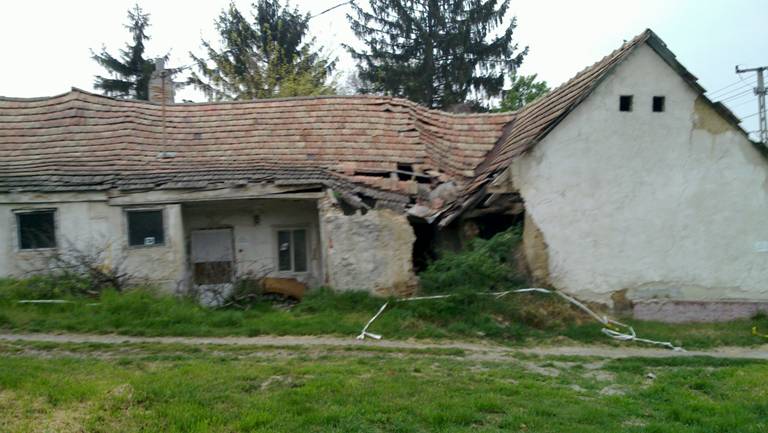
- Water pours on the wall:
Unfortunately, I saw this in person. In the street beside us, the
water flowed from the road to a wall of adobe. They did not dig in,
the wall was not renewed and no attempt was made to renovate it (for
example, we can not expect too much from an old woman). Over the
years the wall was saturated with water, unfortunately there was no
soil, which could have saved it in that state.
The movement of the
loess in the area was just a foam on the cake ... It can be seen that
the protruding part of the wall was standing by rainwater, which
could not withstand the burden.
Finally, the local government
bought and dismantled the life-threatening building. The road has
been renewed and the ground water was drained with drainage pipes.
Concrete room: If a loft is
traditionally made without bottom waterproofing (almost certainly in
the 80's, before the 90's), the soil vapor from the soil can
evaporate through walls and traditional floorboards.
If this
system is roughly interrupted by pouring concrete floor in place of
the floor, the vapor (since the cement is closed) can not get through
the floor, so it will accumulate under the floor and get exhausted in
the lower part of the walls. If the walls can not evaporate this, the
walls are already watered, which may have been completely unknown to
the house before the concrete was completed. There are several ways
to do this.
One is that the wall is subsequently grounded and a
waterproof layer is created above the ground 10-30 cm. This is also
seamlessly bonded with the concrete floor insulation. This is of
course the most expensive solution.
The other way is to get the
room deeply digged and to fill the floor with a pebble (pebbles with
large grain) and under the floor level under 30-50cm thickness and
install ventilators under the floor eg. faláttöréssel. On the outer
side of the wall there is also an artificial evaporation zone using a
pebble and geotextile separator, but it does not matter if the eaves
are wide enough to prevent rainfall. The gravel is not good in this
place because it fills the space and can not peel the pebbles, but
rather absorbs the water!
Solutions:
If the walls are
moving, sinking, watering, the best solution is intermittent
underfloorization. It's a pretty busy job and time consuming task.
To
do this, first and foremost, a ditch will be excavated outside and
inside the wall (hence the sub wall for concrete is accessible).
Roof
beams should be relieved to support the wall part to be
excavated.
Under the wall, the bases are expanded in 0.5-1 m
sections and their location is paved. Repeat this every 3 meters (in
case of 1m extraction)
If necessary, roof beams are supported over
the expanded wall section (recommended).
The concrete has to be ironed, which must be connected when the sections are made. So it looks like it is being excavated under the wall for a 1 meter long, 2-meter skip, then again a 1-meter pit and so on. Logically, the house is made after three such steps, but it is necessary to wait for the binding time of the previous concrete. The width of the excavation must be determined by a static specialist because the different masonry units have different loads. If we are not sure whether the wall can withstand a 1-meter gap at the bottom, let's do 0.5-0.7-meter holes in 4 steps, just as someone's wall hangs. The expert's opinion is always justified.
Another solution to drain the vapor: the venting shaft (this can be outside or inside the wall, but it is more advisable to get a lot of water from the outside of the house). It is a small trench next to the wall, which is bricked on both sides with bricks, the two walls protruded to one another, so that it can not collapse, and between it a hollow section where the air can pass. Its operation is very simple: water does not get to the wall of the house, but only to the wall of the trench, and here the water evaporates through the ventilation. (It also evaporates on the brick wall on the side of the house). If you can not dig directly to the wall of the house due to the risk of a fall, you have to leave 1-2 meters and dig the ditch.
This method was used with old castles and cellars with great success. Ventilation shafts are often made of a size suitable for human transport. Obviously, for a family house, this is not necessary.