| [ < ] | [ > ] | [ << ] | [ Up ] | [ >> ] | [Top] | [Contents] | [Index] | [ ? ] |
Written by Andreas Busch, nobita@t-online.de. Last updated 1 April 2004.
This HOWTO is a step by step guide for creating a Crystal Space application using KDevelop as your integrated development environment outside the Crystal Space source tree.
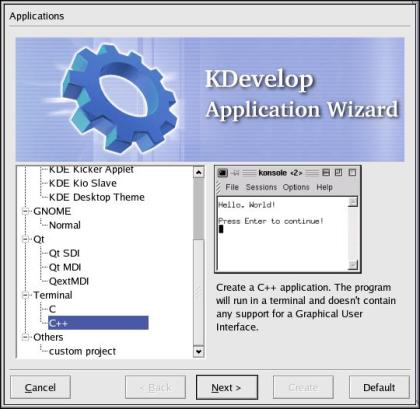
Open KDevelop and click on New from the Project menu. The KDevelop Application Wizard offers you special settings for the creation of dedicated GNOME or KDE/Qt applications, but the selection Terminal-C++ is usually sufficient for creating a new Crystal Space project (i.e. using OpenGL).
In the Generate settings dialog enter the Project name as well as the Project directory for your project files outside the Crystal Space tree. When you mark the checkbox generate sources and headers the Hello World `main.cpp' and `main.h' files are generated which can be used if you want to start from scratch. If you want to import source files to start with, leave it unchecked. The GNU-Standard-Files option copies the General Public License file `COPYING' a dummy `README' and `INSTALL' file into the project tree.
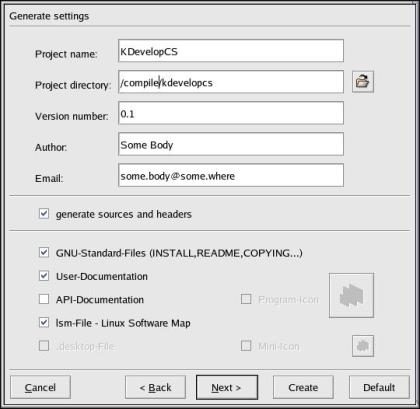
Click Next and you will next be confronted with another dialog box.
If you want Version Control Support you can select CVS now and fill the required fields according to your CVS environment, otherwise leave it set to NONE.
The Next two pages are header templates for header `.h' and source `.cpp' files. Click Next when you're done here.
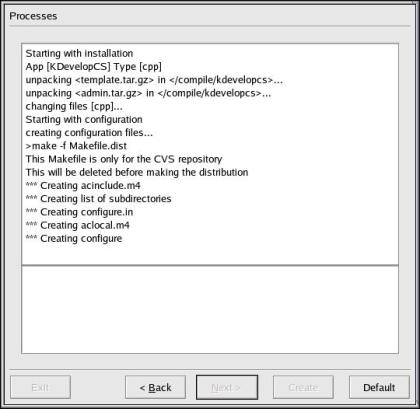
Now an almost empty window appears and you should click on Create to run an automake. After that you can click on Exit and do the relevant parts for using KDevelop with Crystal Space.
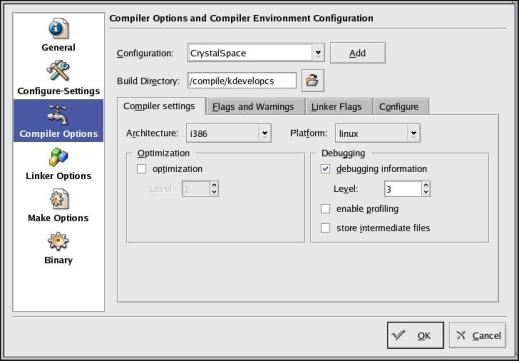
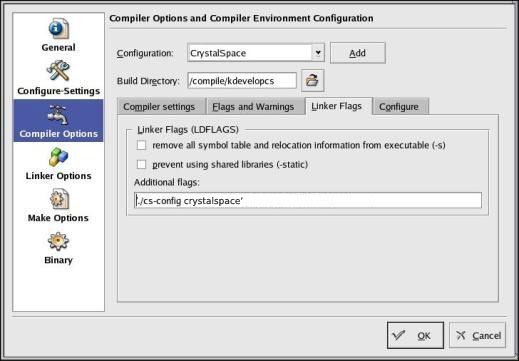
Click on Options in the Project menu and select Compiler Options. Add a new Configuration and call it CrystalSpace, then make sure to set the path back to the correct Build Directoy.
When you installed Crystal Space, the script `cs-config' should have been placed in the `bin/' installation directory, and this directory should be mentioned by your `PATH' environment variable,so that you can invoke `cs-config' as you would any other program simply by typing its name. If you did not install Crystal Space, then you may want to copy `cs-config' into the top directory of your new project, or alter your `PATH' variable so that it points at the directory containing `cs-config' (the Crystal Space build directory, for instance). In the examples below which invoke `cs-config', be sure to include the backticks in the fields CFLAGS and CXXFLAGS in the Flags and Warnings tab for the `cs-config' script to be executed properly, otherwise you will get an error message that your C-compiler cannot create executables. The CFLAGS field should contain ``./cs-config --cflags`', and CXXFLAGS should contain ``./cs-config --cxxflags`'.

The same applies to the field Additional flags in the Linker Flags tab. After ``cs-config --libs`' you may add the Crystal Space primary library `crystalspace'; thus, the entire content of the Additional flags field might be ``./cs-config --libs crystalspace`'.
Now over to the Linker Options. Include your additional libraries here as needed. Many platforms will require `-lpthread' in this field.

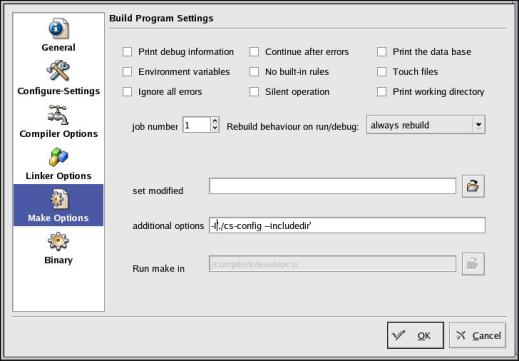
In the Make Options dialog you need to set the include directory for
Crystal Space. Don't forget the backticks for automatic execution upon build.
The additional options field should contain
-I`./cs-config --includedir`.
Click on OK and the configure will re-run.
In the Compile Configuration you can now change from (Default) to CrystalSpace to set your compiler options. If you want to compile for different target platforms or optimized processor-types you can invoke Configure in the Build menu with different arguments. For example, `--host=i686-linux --build=i686-linux --target=i686-linux', instead of the `i386-linux' default in KDevelop. Of course, you can choose other platforms as well.
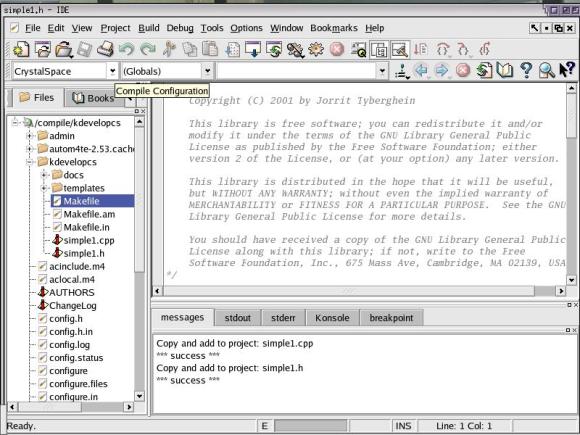
In the Project menu you can now Add existing File(s) to your
project. Select the `simple1.cpp' and `simple1.h' files from the
Crystal Space code tree and add them to your project destination directory.
You may want to uncheck the insert templates box to keep the files
unmodified.
These files can be found within the Crystal Space source code tree at the following location:
`CS/apps/tutorial/simple1'
Alternately, you can type in your own Crystal Space program, but for the sake of this tutorial, using the existing `simple1' application is easier.
The resulting KDevelop project session file `kdevelopcs.kdevses' will look like this. (You do not need to edit this file by hand; it is shown here for illustrative purposes only.)
<?xml version="1.0" encoding="UTF-8"?>
<!DOCTYPE KDevPrjSession>
<KDevPrjSession>
 <CompileConfigs>
  <CrystalSpace>
   <Architecture>i386</Architecture>
   <Platform>linux</Platform>
   <VPATHSubdir>/compile/kdevelopcs</VPATHSubdir>
   <CFLAGS>`./cs-config --cflags`</CFLAGS>
   <CPPFLAGS></CPPFLAGS>
   <CXXFLAGS>-O0 -g3 -Wall</CXXFLAGS>
   <AdditCXXFLAGS>`./cs-config --cxxflags`</AdditCXXFLAGS>
   <LDFLAGS>`./cs-config --libs crystalspace`</LDFLAGS>
   <ConfigureArgs>--build=i386-linux --host=i386-linux \
    --target=i386-linux</ConfigureArgs>
  </CrystalSpace>
 </CompileConfigs>
 <LastCompileConfig>CrystalSpace</LastCompileConfig>
 <Mainframe MaximizeMode="1" />
 <DocsAndViews NumberOfDocuments="1" >
  <Doc0 CursorPosLine="0" Type="KWriteDoc" NumberOfViews="1" \
   CursorPosCol="0" FileName="/compile/kdevelopcs/kdevelopcs/main.cpp" >
   <View0 Top="0" Width="406" Attach="1" Height="328" Left="0" \
    Focus="1" Type="KWriteView" MinMaxMode="2" />
  </Doc0>
 </DocsAndViews>
</KDevPrjSession>
|
The following is the content of the KDevelop project file `kdevelopcs.kdevprj'. (Keep in mind that this file is created and updated automatically by KDevelop, so you do not need to manually change this file either.)
[AUTHORS] dist=true install=false install_location= type=DATA [COPYING] dist=true install=false install_location= type=DATA [ChangeLog] dist=true install=false install_location= type=DATA [Config for BinMakefileAm] bin_program=kdevelopcs cxxflags=-O0 -g3 -Wall ldadd=-lpthread ldflags= [General] AMChanged=false author=Some Body configure_args= email=some.body@some.where execute_args=-video=opengl kdevprj_version=1.3 lfv_open_groups= make_options=-j1 -I/usr/local/include/crystalspace makefiles=Makefile.am,kdevelopcs/Makefile.am, \ kdevelopcs/docs/Makefile.am,kdevelopcs/docs/en/Makefile.am modifyMakefiles=true project_name=KDevelopCS project_type=normal_cpp sgml_file=/compile/kdevelopcs/kdevelopcs/docs/en/index.sgml short_info= sub_dir=kdevelopcs/ version=0.1 version_control=None [INSTALL] dist=true install=false install_location= type=DATA [LFV Groups] GNU=AUTHORS,COPYING,ChangeLog,INSTALL,README,TODO,NEWS Headers=*.h,*.hh,*.hxx,*.hpp,*.H Others=* Sources=*.cpp,*.c,*.cc,*.C,*.cxx,*.ec,*.ecpp,*.lxx,*.l++,*.ll,*.l groups=Headers,Sources,GNU,Others [Makefile.am] files=kdevelopcs.kdevprj,admin,AUTHORS,COPYING,ChangeLog, \ INSTALL,README,TODO,kdevelopcs.lsm sub_dirs=kdevelopcs type=normal [README] dist=true install=false install_location= type=DATA [TODO] dist=true install=false install_location= type=DATA [admin] dist=true install=false install_location= type=DATA [kdevelopcs.kdevprj] dist=true install=false install_location= type=DATA [kdevelopcs.lsm] dist=true install=false install_location= type=DATA [kdevelopcs/Makefile.am] files=kdevelopcs/simple1.cpp,kdevelopcs/simple1.h sub_dirs=docs type=prog_main [kdevelopcs/docs/Makefile.am] sub_dirs=en type=normal [kdevelopcs/docs/en/Makefile.am] files=kdevelopcs/docs/en/index.html,kdevelopcs/docs/en/index-1.html, \ kdevelopcs/docs/en/index-2.html,kdevelopcs/docs/en/index-3.html, \ kdevelopcs/docs/en/index-4.html,kdevelopcs/docs/en/index-5.html, \ kdevelopcs/docs/en/index-6.html sub_dirs= type=normal [kdevelopcs/docs/en/index-1.html] dist=true install=false install_location= type=DATA [kdevelopcs/docs/en/index-2.html] dist=true install=false install_location= type=DATA [kdevelopcs/docs/en/index-3.html] dist=true install=false install_location= type=DATA [kdevelopcs/docs/en/index-4.html] dist=true install=false install_location= type=DATA [kdevelopcs/docs/en/index-5.html] dist=true install=false install_location= type=DATA [kdevelopcs/docs/en/index-6.html] dist=true install=false install_location= type=DATA [kdevelopcs/docs/en/index.html] dist=true install=false install_location= type=DATA [kdevelopcs/simple1.cpp] dist=true install=false install_location= type=SOURCE [kdevelopcs/simple1.h] dist=true install=false install_location= type=HEADER |
That is all there is to it. Select Make from the Build menu, see
your application correctly building, and do a test launch with Execute
or Execute with arguments if you want to add -video=opengl for
OpenGL rendering.
| [ < ] | [ > ] | [ << ] | [ Up ] | [ >> ] |
This document was generated using texi2html 1.76.