|
|
Table of Contents |
|
Hack 14 Create Filled Circles Quickly at Runtime
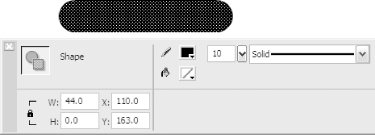
Creating filled circles at runtime can be processor-intensive. Draw circles using a single straight line for performance and greater flexibility than author-time drawing allows. Drawing filled rectangles with the Drawing API is relatively easy-you define four corner points and fill the area enclosed by them. Circles are more problematic. You either have to approximate the circle's curvature with multiple straight lines or use the MovieClip.curveTo( ) method to create a series of arcs. In either case, the trigonometry slows down your code and makes it impenetrable to those of us put off by sines and cosines. Not to worry, there's a far easier way to draw filled circles in Flash-draw a single straight line. Whenever you draw a straight line, you will notice that the ends of the line are rounded, as shown in Figure 3-1. Figure 3-1. A short line with rounded ends So you may be thinking, "Hey, I see what he's getting at. If I draw a line short enough that the two rounded ends touch, I end up with a circle, right?" Sort of. The Pencil and Line tools don't allow you to draw a line short enough, and they limit the line thickness to 10, which doesn't allow you to create large circles. And the whole idea is to draw circles at runtime, so the hack relies on ActionScript to draw very short, very thick lines. Try this: var clip:MovieClip = this.createEmptyMovieClip("circle_mc",
this.getNextHighestDepth( ));
circle_mc._x = circle_mc._y = 150;
circle_mc.lineStyle(200, 0x0, 100);
circle_mc.moveTo(0, 0);
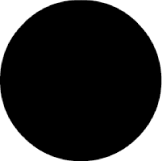
circle_mc.lineTo(0.2, 0);The preceding code draws a circle as shown in Figure 3-2. Figure 3-2. A line so short that the rounded ends form a circle The circle consists of a single line 0.2 units long but of thickness 200 units. Because the line is so short, Flash draws the two curved endpoints very close together, resulting in a nearly perfect filled circle of diameter 200. You can use this trick in all sorts of applications when you want to draw circles dynamically. The CodeThe following code (available as dynaButton.fla on this book's web site) creates a menu consisting of our hacky circles used as buttons. The lines in bold create our hacky circles within a movie clip: function createButton(dynaButton, dynaLabel, depth, x, y) {
var clip = this.createEmptyMovieClip(dynaButton, depth);
clip.lineStyle(15, 0x0, 100);
clip.moveTo(0, 0);
clip.lineTo(0.2, 0);
clip._x = x;
clip._y = y;
var txt_fmt:TextFormat = new TextFormat( );
txt_fmt.font = "_sans";
txt_fmt.size = 12;
this.createTextField(dynaButton + "_txt", depth + 1,
x + 10, y - 10, 100, 20);
var textLabel = this[dynaButton + "_txt"];
textLabel.text = dynaLabel;
textLabel.setTextFormat(txt_fmt);
}
createButton("home_btn", "home", 1, 100, 10);
createButton("products_btn", "products", 3, 100, 30);
createButton("about_btn", "about us", 5, 100, 50);
createButton("links_btn", "links we like", 7, 100, 70);
home_btn.onRelease = function( ) {
// Do stuff
};
products_btn.onRelease = function( ) {
// Do stuff
};
about_btn.onRelease = function( ) {
// Do stuff
};
links_btn.onRelease = function( ) {
// Do stuff
};When you run the code, you will see the dynamically generated menu shown in Figure 3-3. Figure 3-3. A menu using hacky circles as bullet points Hacking the HackTo make the code much more flexible, we could extend the idea by creating an ActionScript 2.0 button-making class as follows: // This ActionScript 2.0 code must go in an external CreateButton.as file
class CreateButton {
// Variable target is the timeline that the
// CreateButton instance will create buttons on.
private var target:MovieClip;
// Constructor.
public function CreateButton(targetTimeline:MovieClip) {
target = targetTimeline;
}
// Define createBtn( ) method
// Arguments:
// buttonName - The instance name of the created button.
// dynaLabel - The label text of the created button.
// depth - The depth of the created button.
// x, y - The position of the created button.
// Returns:
// A button movie clip with instance name buttonName.
public function createBtn(buttonName:String, dynaLabel:String,
depth:Number, x:Number, y:Number):MovieClip {
// Initialize.
var clip:MovieClip;
var clipMask:MovieClip;
var txt_fmt:TextFormat;
var clipText:TextField;
// Create button clip.
clip = target.createEmptyMovieClip(buttonName, depth);
drawPip(clip);
clip._x = x;
clip._y = y;
// Create button hit area.
clipMask = clip.createEmptyMovieClip("mask", 0);
clipMask._visible = false;
drawPip(clipMask);
clip.hitArea = clipMask;
// Create TextFormat object for applying formatting.
txt_fmt = new TextFormat( );
txt_fmt.font = "_sans";
txt_fmt.size = 12;
// Create textField (i.e., the button label).
clip.createTextField(buttonName + "_txt", 1, 10, -10, 100, 20);
clipText = clip[buttonName+ "_txt"];
clipText.text = dynaLabel;
clipText.setTextFormat(txt_fmt);
return clip;
}
private function drawPip(clip):Void {
clip.lineStyle(15, 0x0, 100);
clip.moveTo(0, 0);
clip.lineTo(0.2, 0);
}
}To use the CreateButton class, place the preceding code in a file named CreateButton.as. Then create a new .fla file in the same directory as CreateButton.as. From this .fla file, create a new instance of the CreateButton class as follows: var buttonGen:CreateButton = new CreateButton(this); The CreateButton class takes one argument, the timeline (i.e., main timeline or movie clip) on which we want to create buttons. Once we have created our CreateButton instance, we can use the CreateButton.createBtn( ) method to create buttons on our target timeline: var home:MovieClip = buttonGen.createBtn("home", "home",
this.getNextHighestDepth( ), 100, 10);
var products:MovieClip = buttonGen.createBtn("products", "products",
this.getNextHighestDepth( ), 100, 30);
var about:MovieClip = buttonGen.createBtn("about", "about us",
this.getNextHighestDepth( ), 100, 50);
var links:MovieClip = buttonGen.createBtn("links", "links we like",
this.getNextHighestDepth( ), 100, 70);
home.onRelease = function( ) {
trace("You clicked the home button");
};
products.onRelease = function( ) {
trace("You clicked the products button");
};
about.onRelease = function( ) {
trace("You clicked the about button");
};
links.onRelease = function( ) {
trace("You clicked the links button");
};This code creates the same buttons as the previous listing, but it has a number of advantages:
There have been a lot of complaints that Flash MX 2004 components are too bloated [Hack #73] if all you want are simple buttons and scrollbars [Hack #64] (the most typical UI components required). The preceding code presents a simple solution-create a component-making class of your own! Not only is this more bandwidth efficient than the Flash MX 2004 v2 components, it is also more bandwidth efficient than the older Flash MX v1 components. Of course, knowing a hacky and quick way to generate a circle graphic makes runtime generation of the component, and also the component graphics, much easier.
The circles can also be used in a Flash drawing application or 3D wire-frame toy to represent draggable points, as implemented in the following listing (available as dynaPoint.fla on this book's web site): function createPoint(dynaPoint, depth, x, y) {
clip = this.createEmptyMovieClip(dynaPoint, depth);
clip.lineStyle(20, 0x0, 100);
clip.moveTo(0, 0);
clip.lineTo(0.2, 0);
clip._x = x;
clip._y = y;
}
function drag( ) {
this.startDrag(true);
paper.onMouseMove = drawLine;
this.onPress = drop;
}
function drop( ) {
this.stopDrag( );
delete (paper.onMouseMove);
this.onPress = drag;
}
function drawLine( ) {
this.clear( );
this.lineStyle(2, 0x0, 100);
this.moveTo(point1._x, point1._y);
this.lineTo(point2._x, point2._y);
updateAfterEvent( );
}
// Example usage:
createPoint("point1", 1, 100, 100);
createPoint("point2", 2, 120, 100);
point1.onPress = drag;
point2.onPress = drag;
this.createEmptyMovieClip("paper", 0);To test the example, click on a point to drag it, as shown in Figure 3-4; click again to stop dragging. Figure 3-4. Clicking and dragging a dynamic circleAs you can see from the previous two code examples, being able to create filled circles very quickly has more uses than you might realize. A single filled circle is the most commonly used shape for a button or clickable area. |
|
|
Table of Contents |
|