Dark Signs
Training
Mission Tutorial
Back to Index
Mission
Objective: Retrieve the Internal Services Phone Number
Starting
Link: SECUREDIGITAL.com
Welcome to Dark Signs… the object of this short
mission is to retrieve the phone number used for Internal Services. This is a
training mission designed to teach you some basic commands and skills of the
game.
NOTE: Whenever you see something written in this font it means that it is a command you
type into the console in the game.
First we will need to obtain information on our first target,
securedigital.com. Type the following command into the game.
Scan securedigital.com
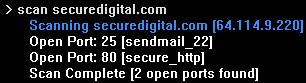
You will find that there are two ‘ports’, or two places
on securedigital.com that will accept a connection. The default ‘port’ is 80.
Type the following command to attempt a connection to securedigital.com on
port 80. You can use this command at any time if you for some reason get
disconnected.
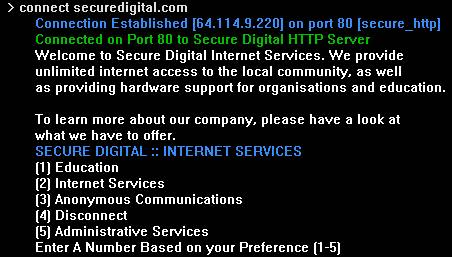
Connect securedigital.com
This will connect you to secure digital public
interface. Here you can find information on their company, however your aim
here is to search through all there data for anything that might be useful.
One by one, read all of their information and look for anything that might be
useful. Enter 1 and press enter, then the same for 2, 3, and 5. (4 will
disconnect you). It is often useful to look closely at the information they
have available as any of it might be a key to cracking into their computer
systems.
The key here is option 5, Administrative services. Looking closely at the
SYSTEM ERROR, you come to the realization that hidden in that supposed
‘random useless data’ is a username and password! Notice on line 5 pass-digital,
and on line 9; user-secure. You may want to record this information on
a file on your own computer. You can do this using the EDIT command once you
have disconnected from securedigital.com. Type help edit in the game for more information on
this command.
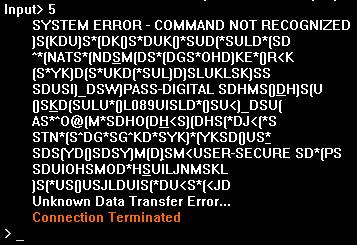
So, we now have the following information.
Username: secure
Password: digital
This information seems to relate to the server securedigital.com. Since there
is no login options on port 80 of securedigital.com (where you were just connected
to), we can now try connecting to any other ‘ports’ that were open on
securedigital.com. Looking back at the scan we did of this server earlier, we
can see there were two ports open, 25 and 80. Let’s try 25. We can connect to
a specific port on a server can be done by typing the port number directly
after the server, for example, type the following command.
Connect securedigital.com 25
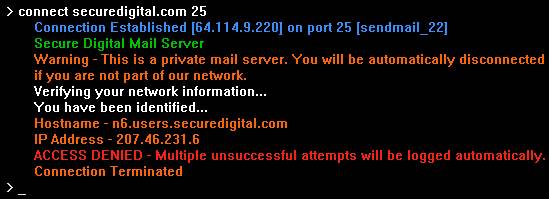
As you will see, your access to this mail server will be
denied. It returns the message ‘ACCESS DENIED – Multiple unsuccessful
attempts will be logged automatically’. It is safe to assume the
administrators of this server may notice if we keep trying to connect
unsuccessfully. The return message
also notes that we were automatically disconnected, as we are not part of
their network. Is there a way to somehow, make it look like we ARE part of
their network?
Proxy Servers can be used to connect to servers in the game, and
anonymously. You can use these proxy servers to hide your IP address. When
you connect to a server through a proxy server, the target server will only
see the IP address of the proxy server, and not your IP address.
Let’s think… perhaps there is a proxy server that is part of the secure
digital network! There is a command in Dark Signs called trace. You
can use this command to display a list of servers that lie between you and a
specified server, for example, lets use the trace command on
securedigital.com.
Trace securedigital.com
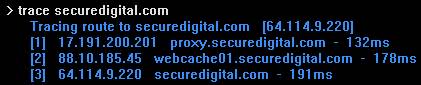
Using this command shows us there is a secure digital
proxy server! Let’s scan it and see what we can do.
Scan proxy.securedigital.com
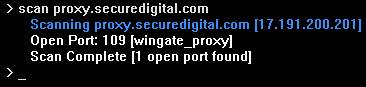
Scanning the proxy server reveals that port 109 is open,
and running a proxy server. Connect to this port using the following command.
Connect proxy.securedigital.com 109
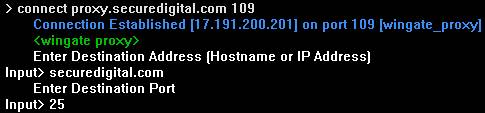
You are connected. It will ask you to enter a
destination hostname or IP address. This means it is asking you to enter a
server or the IP address of the server. Remember, we want to connect to
securedigital.com. So type securedigital.com into the input and press
enter once.
The proxy server will now ask you to enter a destination port. Enter 25 here
and press enter again. If you look back, you will see why we need to connect
to port 25 through the proxy server. Before, the connection to
securedigital.com on port 25 was denied because we weren’t part of the secure
digital trusted network, however the proxy server may give us access.
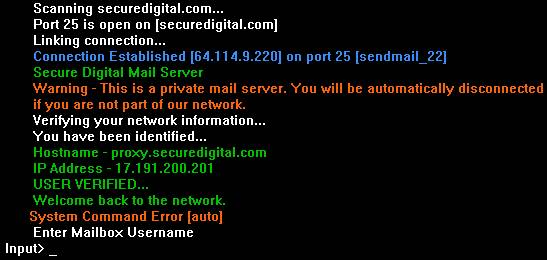
It should verify you, and grant you access! Now, type in the username and
password you found at the beginning. If at any time you type something wrong
or get disconnected, you may need to go and connect through the proxy server
again.
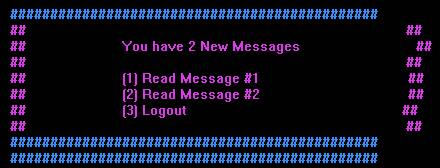
You should now be successfully connected to the Secure Digital mail
server…
Type in secure when it asks for a username, and type in digital
when it requests the password. If all goes well, you should see be logged
into your email box!
Reading the first message, you find no immediately valuable information,
however the second email message reveals a username and password appearing to
be in an email from our prime target, internal services, located at
internalservices.org!
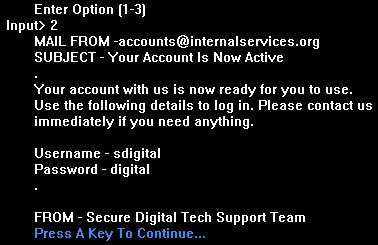
Remember the new username and password you have found.
Username: sdigital
Password: digital
Now we know the address of internal services. Let’s have a look at them. Type
the following command to scan their server.
Scan internalservices.org
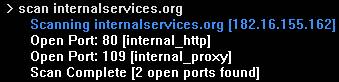
You should see they are also running a proxy server,
however that may not be too useful just now. Lets take a look at their port
80. Type the following command to connect to their machine on the default
port, 80.
Connect internalservices.org 80
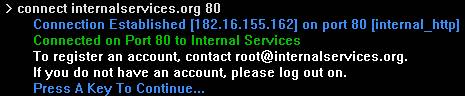
It asks you for a username and password. Lets try the information
we found in the email. Enter sdigital for the username, and
enter digital for the password. The following information should
be displayed.
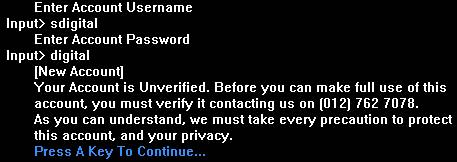
Congratulations… you have found what you were looking for in this mission, the Internal Services phone number! Note that in this training
mission, there is no need to do anything with this number.
Starting the
main missions...
Back
to Index > Basic Mission Tutorial
|
