Throughout this Book, we've been assuming that you're entering and executing the example SQL statements in the simplest way possible—using the SQL editing tools provided by the database. These tools vary considerably in their complexity, and it's not the purpose of this book to examine them in detail; however, we do need to show how we're expecting you to execute the examples!
Because each database vendor provides its own tools for entering and executing SQL statements on the fly, this appendix covers each of the systems in turn. It provides step-by-step instructions for connecting to the InstantUniversity database and executing SQL statements. You'll examine the InstantUniversity database in Appendix B, "Setting Up the InstantUniversity Database."
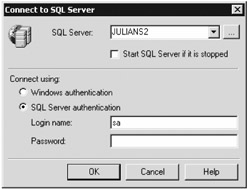
The easiest way to execute SQL statements against a SQL Server (7.0 or higher) database is using Query Analyzer. Open Query Analyzer from the Start menu (Programs Ø Microsoft SQL Server Ø Query Analyzer), and you'll be prompted to enter the connection details for the database server you want to connect to, as shown in Figure A-1.
The SQL Server instances running on your network should all appear in the SQL Server drop-down box, so select the appropriate one (or type the name if it doesn't appear). Next, select the authentication mode used to connect to your server. Windows authentication uses the accounts of users on the domain or the local Windows computer to authenticate users, and SQL Server authentication uses special logon accounts created and managed by SQL Server itself.
If you select Windows authentication, SQL Server will use the username and password you're currently using to log on to Windows; otherwise, you'll need to enter a SQL Server login name and password.
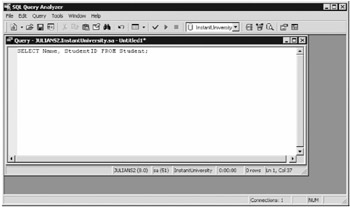
Once you've entered the connection details, click OK, and Query Analyzer will open. Select the InstantUniversity database from the drop-down box on the toolbar to ensure that queries are executed against this database. You can then type SQL queries directly into the Query window and execute them by clicking the green arrow to the left of the database drop-down list, as shown in Figure A-2.
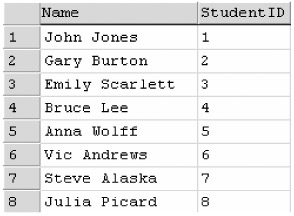
Any results will be displayed in a new pane in the Query window, as shown in Figure A-3.
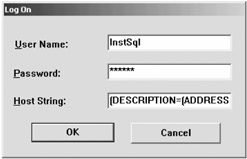
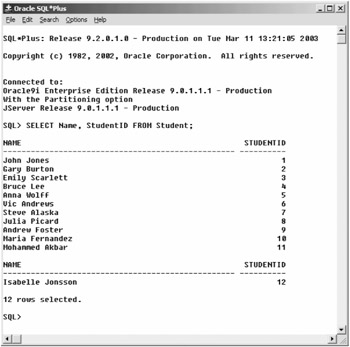
The standard utility for entering queries against an Oracle database is SQL*Plus, which in appearance is a simple text editor, similar to a command prompt. When you open SQL*Plus, you're prompted to enter connection details, as shown in Figure A-4.
As well as the username and password for the user you want to log on as, you must supply the service name of the database to which you want to connect. If Oracle can't resolve the service name, you may need to supply a complete TNS descriptor for the database. For example:
(DESCRIPTION=(ADDRESS_LIST=(ADDRESS=(PROTOCOL=TCP)
(HOST=servername)(PORT=1521)))(CONNECT_DATA=
(SERVICE_NAME=servicename)))
| Note |
You can get the TNS descriptor from the General tab for the database in Oracle Enterprise Manager Console. |
Once SQL*Plus has loaded, you can type queries directly into the editor; any results will appear immediately after the query, as shown in Figure A-5.
For single SQL statements, the query will execute as soon as you enter a line ending in the semicolon termination character. For multistatement queries (for example, CREATE PROCEDURE), which can contain semicolons, you need to mark the end of the statement using the / character:
DB2 provides a number of tools that allow you to enter and execute SQL statements, but for this book, we'll assume you're using Command Center.
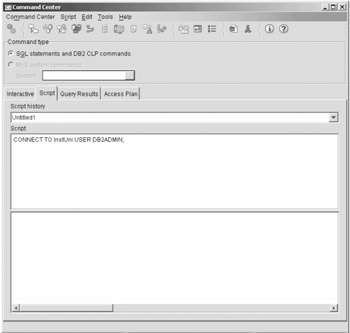
Command Center has two tabs where you can enter SQL statements, the Interactive and Script tabs. The Script tab allows you to save multiquery scripts, and the SQL window is more generously proportioned, so we'll use that, as shown in Figure A-6.
Because Command Center doesn't prompt you for connection details when it loads, you need to execute a CONNECT statement before you can access the database. You'll see the precise format of this command later in this appendix, but the basic syntax is as follows:
CONNECT TO database USER username USING password;
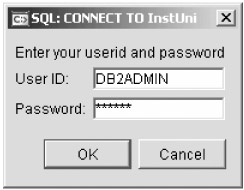
You execute statements in the Script window by selecting Script Ø Execute from the main menu. You don't need to provide a USING clause for the CONNECT statement. For example:
CONNECT TO InstSql USER DB2ADMIN;
If you don't provide a password, DB2 will prompt you to enter one, as shown in Figure A-7.
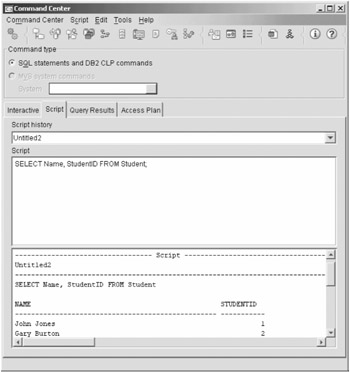
Any output from SELECT statements, stored procedures, and so on appears in the pane below the SQL pane, as shown in Figure A-8.
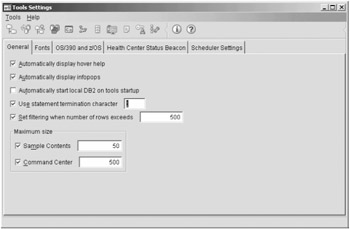
By default, Command Center will assume that any semicolons it encounters mark the end of a statement. If you want to execute multistatement queries (for example, in a BEGIN ATOMIC...END block), you need to change the default statement termination character to something else so Command Center will send the whole query, not just the part up to the first semicolon. You can do this in the Tools Ø Tools Settings dialog box, as shown in Figure A-9.
MySQL doesn't, by default, come with any specific editors for entering SQL queries (although many third-party management products are available for MySQL). Instead, you use the mysql command-line tool.
This utility allows you to specify many command-line options, but the key ones are as follows:
-u username, --username=username: This is the username to use to log on to the database. Notice that you don't specify the @hostname part of the username because this is supplied automatically.
--password=password: This is the password to use to log on to the database. If no password is provided in the mysql command-line instruction, mysql will prompt you for one.
The database name: You supply this after any other options.
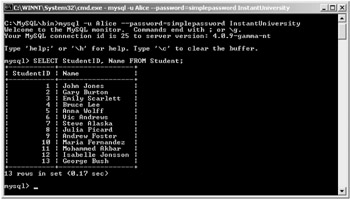
For example, to log on to the InstantUniversity database as Alice@localhost using the password simplepassword, you could use this command:
Once you've logged on to MySQL, you can just type SQL statements at the command prompt, and they'll execute immediately. Any output appears directly in the command window, as shown in Figure A-10.
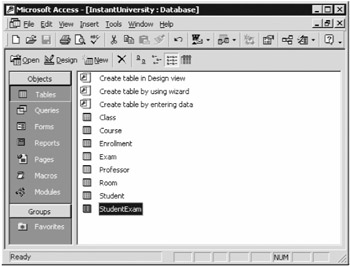
To run queries against the Access version of the database, open the database by double-clicking the InstantUniversity.mdb file in Windows. Access will display a list of the tables in the database, as shown in Figure A-11.
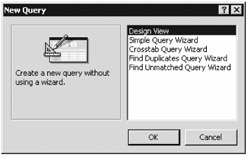
To execute SQL statements against your database, you need to create a new query. To do this, select Insert Ø Query from the main menu. Access will ask you how you want to create the query, as shown in Figure A-12.
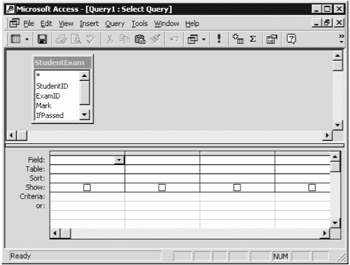
Ensure that the Design View option is highlighted, and click OK. Access will present the design view, which allows you to create queries visually rather than by writing the SQL statements by hand, as shown in Figure A-13.
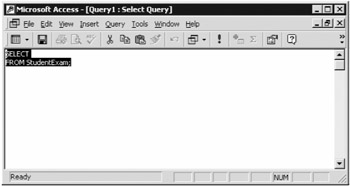
However, this is a SQL book, so you don't want to do that! Select View Ø SQL View from the main menu. Access generates the skeleton of a simple SELECT statement, based on the table highlighted when you inserted the query, as shown in Figure A-14.
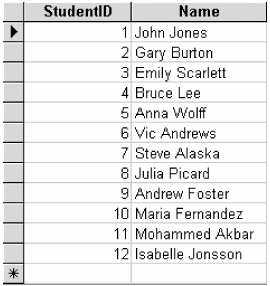
Replace this with the query you want to execute and click the ! icon on the toolbar. Access replaces the current window with the results from the query, as shown in Figure A-15.
When you close the results window, you'll be asked if you want to save the query. If you select Yes, this query will be available to execute as a stored query.