|
|
Table of Contents |
|
Many development tools, text editors, Integrated Development Environments (IDEs), and other Java development environments support Ant. You can add Ant to several existing development tools, such as Ant Farm for jEdit, Eclipse, AntRunner for JBuilder, CruiseControl, and Intellij IDEA.
This chapter explains the tools that support Ant. It also describes how to configure and run the tools.
jEdit is a text editor written in Java for developing Java source code. jEdit is freeware available at http://www.jedit.org/.
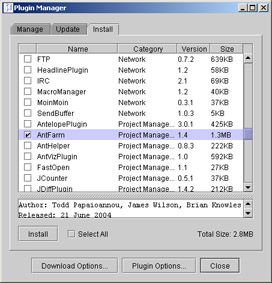
jEdit provides Plugin Manager under Plugins menu option that allows you to add custom-built features to the tool.
You can install Ant Farm using Plugin Manager from jEdit. To install Ant Farm for jEdit:
Select the Plugin Manager menu.
Select Install Plugins->Ant Farm.
Select Install->Ant Farm. This downloads and installs Ant Farm with the required plug ins on the Plugins menu of jEdit.
The Plugin Manager window appears, as shown in Figure 6-1:
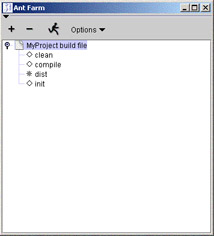
When the installation process is complete, you need to configure Ant Farm. To configure the tool:
Expand the Plugin Options menu.
Select Ant Farm from the Plugins menu. The Ant Farm window appears, as shown in Figure 6-2:
The buildfiles are in the form of a tree. The top of each tree is a buildfile. When you expand the tree, it lists the executable targets of the buildfile. You can execute the listed targets by clicking the Run Current Target button.
The Options drop-down menu contains four items: Prompt for properties, Hide subtargets, Save all before build, and Logging level.
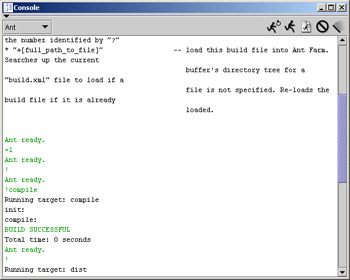
You need to select the buildfile to run Ant Farm. Selecting the icon for the buildfile automatically executes the buildfile. When you execute the buildfile, the Console window displays the build output, as shown in Figure 6-3:
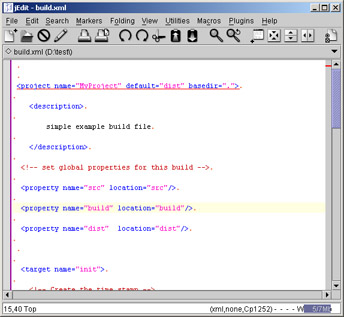
You can edit and create the buildfile using Ant Farm. When you edit and save a buildfile in jEdit, the Ant Farm window automatically updates the list of available targets for that buildfile. You need to right-click the buildfile tree and select the Edit build file option from the drop-down list. Ant Farm shows the buildfile, as shown in Figure 6-4:
|
|
Table of Contents |
|