|
|
Table of Contents |
|
JBuilder is a Java development tool from Borland. JBuilder Enterprise edition 7 and later support Ant. AntRunner is a plug in for JBuilder that executes Ant scripts in JBuilder. AntRunner is freeware available at http://antrunner.sourceforge.net/.
You can download the AntRunner zip file from http://antrunner.sourceforge.net. This zip file contains four files: antrunner.jar, antrunner.config, antrunnerdoc.jar, and antrunnerlogger.jar. To configure AntRunner:
Place the antrunner.jar and antrunner.config files in the /lib/ext/ directory in the home directory of JBuilder.
Place the antrunnerdoc.jar file in the /doc/ directory in the home directory of JBuilder. The home directory is the path where JBuilder is installed. For example, if JBuilder is installed at C:\Program Files\JBuilder, the home directory is C:\Program Files\JBuilder.
Place the antrunnerlogger.jar file in the /lib/ directory of the Ant installation.
Modify the antrunnerconfig.jar file to specify the location of your installation. The antrunnerconfig.jar file contains the text addjars <your path to ANT_HOME goes here>/lib. You need to replace the text <your path to ANT_HOME goes here> with the path of the /lib directory. For example, if you have downloaded the zip file on the C:\ drive, the command is addjars C:\ant\lib.
After configuration, JBuilder adds three icons, Run ANT for default target, Stop ANT, and Reload ANT buildfile, to the toolbar. Using the icons, you can access the controls on Ant targets.
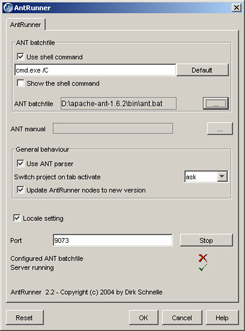
You need to specify the Ant batchfile to AntRunner when you start AntRunner for the first time. The AntRunner window appears, as shown in Figure 6-5:
To run Ant:
Select Ant from the Wizards menu option.
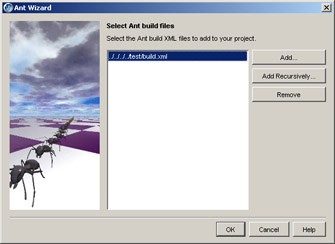
Select the Add button to select the buildfile. The Ant Wizard window that contains the selected buildfile appears, as shown in Figure 6-6:
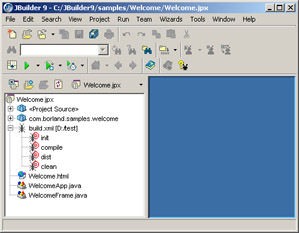
Select the buildfile and click OK in the Ant Wizard window. The selected buildfile appears as a node in the Project tree in the left pane of the window, as shown in Figure 6-7:
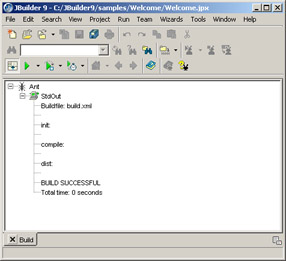
Right-click the Ant node and select the Make option. AntRunner displays the output of the build, as shown in Figure 6-8:
|
|
Table of Contents |
|