Making Movies
The next best thing to actually playing the game is seeing a little movie of the action. Given the small size of MID screens, it's quite practical to create a demo movie that is still small enough to distribute easily (especially via e-mail). Another good reason to create a movie is that some publishers will insist on seeing it before they do a full review of the gamea pretty sensible idea, really.
Carriers and distributors will also use game movies to market your game. The most common use is to embed an animated GIF inside a Web portal. In this section, you'll also look at how to create a cut-down version of your game movie as an animated GIF.
The Camera
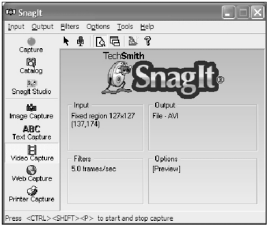
To make a movie, the first thing you need is the equivalent of a camera to capture the images. You'll use video capture software capable of progressively grabbing the graphics from the screen as you play the game. You can then save the frames as an AVI file. There's plenty of software out there to do this; most of it is either free or very cheap. Personally I use SnagIt from TechSmith (see Figure 17.2). It's friendly and powerful, and if you decide to purchase it, it's extremely cheap. You can download a fully-functional 30-day evaluation version from http://www.techsmith.com.
Figure 17.2. The SnagIt capture application
Once you have downloaded and installed SnagIt, start up the application and select the Video Capture option.
Next you need to set the capture area to the 128 x 128-pixel area used by the Nokia emulator. To begin, start the game in the emulator and position it alongside the SnagIt window; then, using SnagIt, select the Properties item from the Input menu. You'll see the dialog box shown in Figure 17.3.
Figure 17.3. Setting the properties ready to start capturing
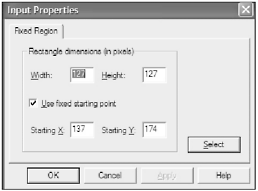
You can use the Select option to visually select the region you want to capture. When you're satisfied, click on OK, and you'll see the capture region parameters updated to match your selection.
Next you need to configure the type of video you want to output. Select the Properties option from the Output menu, and then select the Video File tab (see Figure 17.4).
Figure 17.4. The video configuration options dialog box
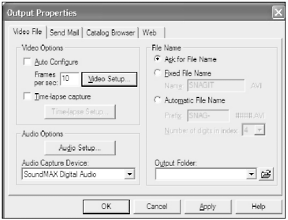
Here you should adjust the number of frames to something like 10. Feel free to adjust the number, but keep in mind the higher the number, the larger the resulting video file. Use the Video Config button to adjust the quality to maximum; this will result in a much higher capture quality. (You'll introduce compression when you edit the video later; for now you want the highest-quality source material you can get.)
Okay, now you're ready to start shooting.
Shooting
The point of your movie is to give viewers a good impression of the best features of your game. To do this, you need to capture a variety of footage of the game as you play through different areas. At this stage you really shouldn't worry about exact timing or the length of what you're capturing; just go ahead and capture tons of stuff. You'll edit it all into something good later.
NOTE
Tip
Using SnagIt you can also capture audio from a microphone as you go. If you think it's worth it, you can add a voiceover explaining features of the game. Most of the time, however, I find there just isn't enough time to say anything sensible without the file getting too big to handle (larger than 10 MB).
To start capturing you need both SnagIt and the game running at the same time. All you need to do is start playing the game. When you reach a section you want to start capturing, hit Ctrl+Shift+P (the default SnagIt hot key to begin capturing). SnagIt will paint a flashing rectangle around what you're currently capturing so you know everything is working.
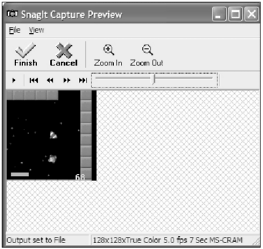
When you've finished capturing, hit Ctrl+Shift+P again, and the recording will stop. You can then preview the result and choose to discard it or save it to a file (see Figure 17.5).
Figure 17.5. The SnagIt preview window lets you review a captured video and save it if required.
You should repeat this process to capture as many aspects of the game as you can, including the front end and menus. When you've got a good set of material, you can move on to editing.
The Editing
Now that you have a bunch of source material, you need to put it all together into a video. To do this, you can use a professional suite such as Adobe Premiere, although the default Windows XP Movie Maker application will certainly do the job.
When editing, try to run through a sort of high-speed tour of the game play. Start with the title and intro to the first level, and then jump through a series of action sequences. Use the editing tools to trim off anything not directly related to the action. The total sequence should go for about 30 seconds and result in a file no bigger than about 5 MB (depending on compression).
Making an Animated GIF
There are two popular types of animated GIFs used to promote J2ME gamesmovies and screen packs. The difference really comes down to the sizes of the resulting GIF files. A movie is simply a version of your AVI saved as an animated GIF, usually with a lower frame rate in order to reduce the file size. Typically, this GIF will be about one-tenth of the original video, but will still give the same general impression.
The absolute best tool I've seen to create animated GIFs is Ulead GIF Animator (see Figure 17.6). You can download a trial version from http://www.ulead.com.
Figure 17.6. Using Ulead GIF Animator to create an animated GIF
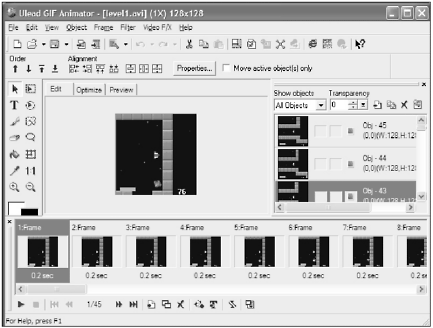
Using GIF Animator, you can import the final AVI file and then manipulate the frame speed or sequence pretty much any way you want. You can also put together a sequence of frames by hand to create an extremely small file.
Another type of animated GIF to create for your game is a screen pack. This is just a selection of screen shots grouped together into an animated GIF and displayed with a slight delay. You can also use GIF Animator to create these.